Our First DIY! Aisle Runner with personalized Monogram

So we finally completed our first DIY project. The total cost: $40
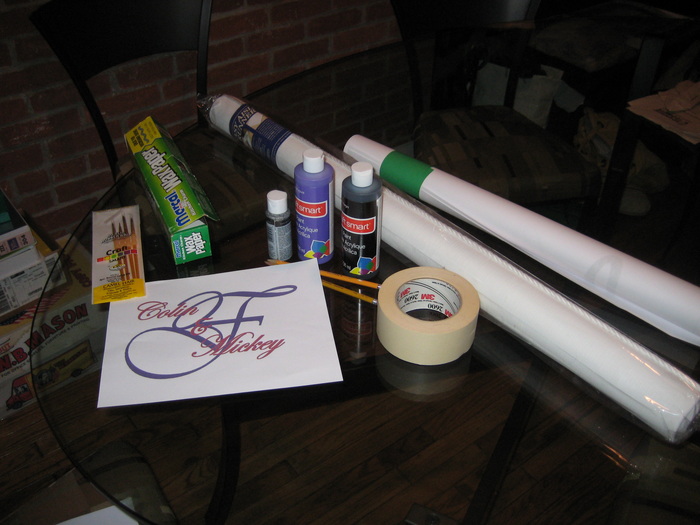
Supplies:
Aisle Runner (from Michaels) $25 - with coupon
Paint (one bottle purple, one bottle silver, and one bottle black) $6 - for all three
Paint Brushes - $3
Paint Sponge - $2
Wax Paper - $1
Englarged Monogram - $2 (from Staples)
Masking Tape - had it already
Crayon - had it already
Directions:
(These were graciously borrowed from "Road to the Aisle" blog and adapted for our colors, monogram, and table!)
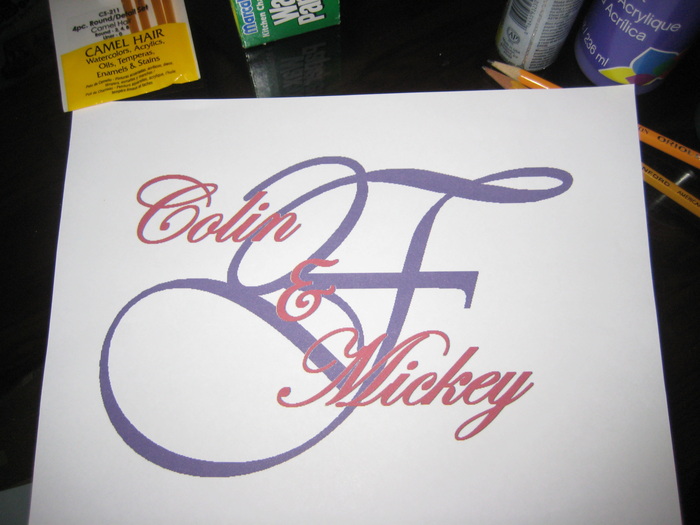
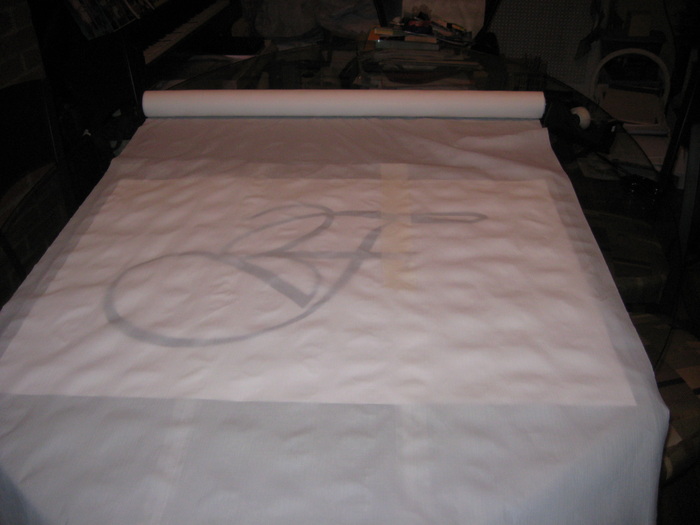
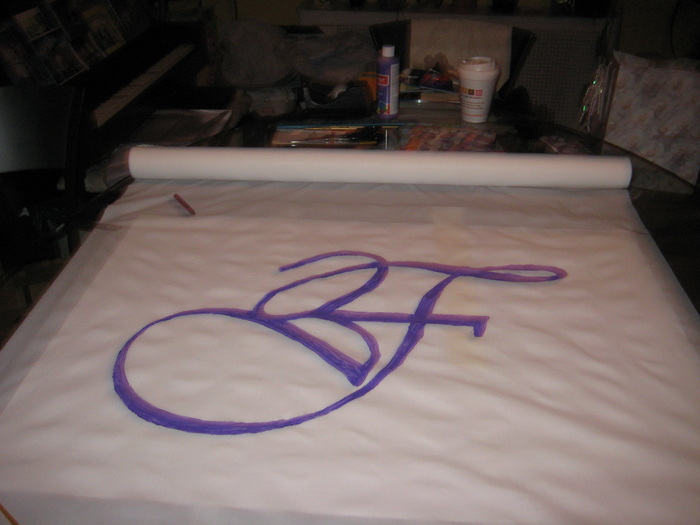
1. Figure out where on the aisle runner you want to paint the monogram. Our aisle runner is 100 ft, with a 100-ft. aisle. We decided to put the monogram about 10-12 feet from the end of the runner so that it will be situated at the back of the church. 2. Lay out the enlarged monogram on a table or floor, and tape down so it will not move. Lay the aisle runner over the monogram and line it up until you like its position.
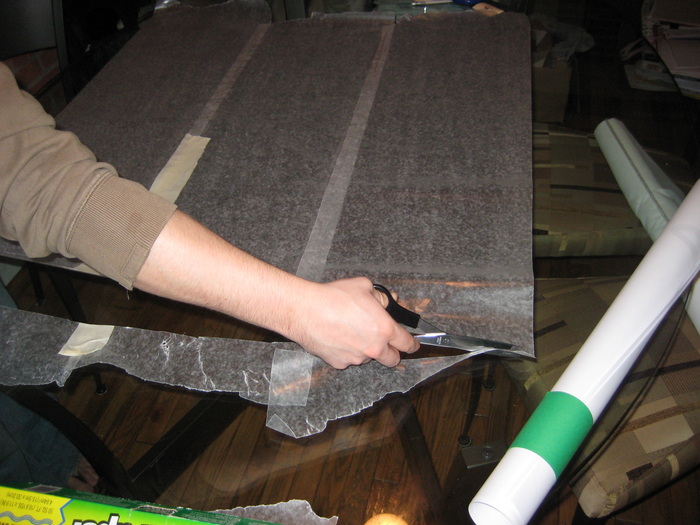
3. Now, tape wax paper to the table/floor before repositioning your aisle runner to paint it. This will prevent paint from bleeding through onto your surface. I've heard some people have made the mistake of putting paper underneath--paint soaks through and gets the paper wet, and it ends up sticking to the back of the runner! Definitely use the wax paper.
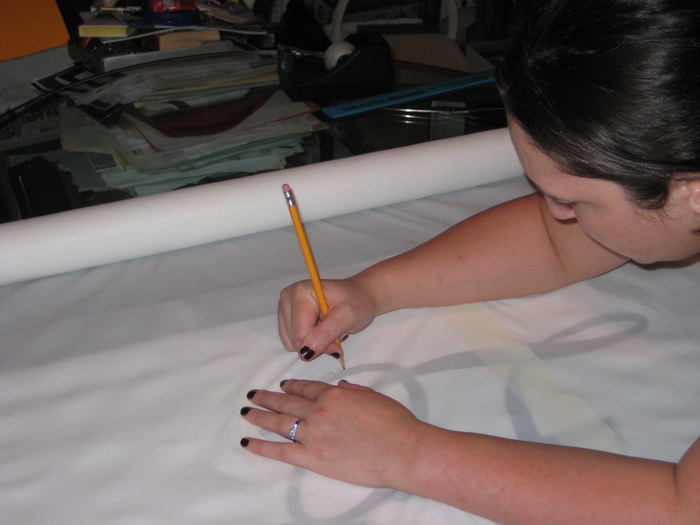
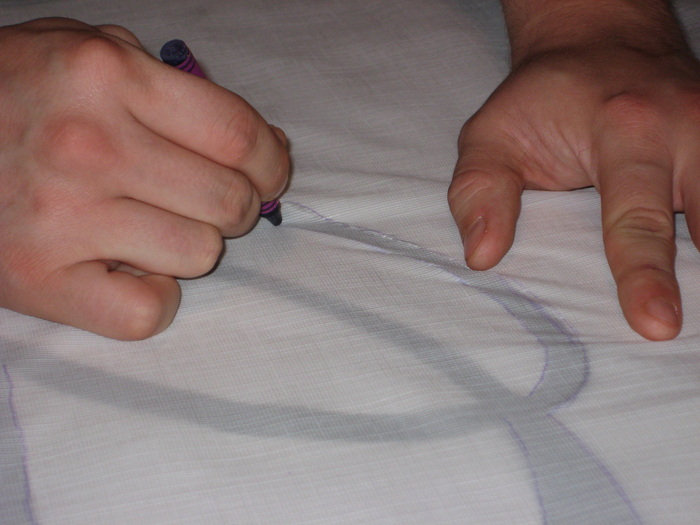
4. Then, trace the design with a crayon (we tried pencil and that was a fail). However, if you're using lighter color paints, I suggest doing it as lightly as possible (while still being able to see it, of course!) because the lighter colors won't cover the pencil marks as well.
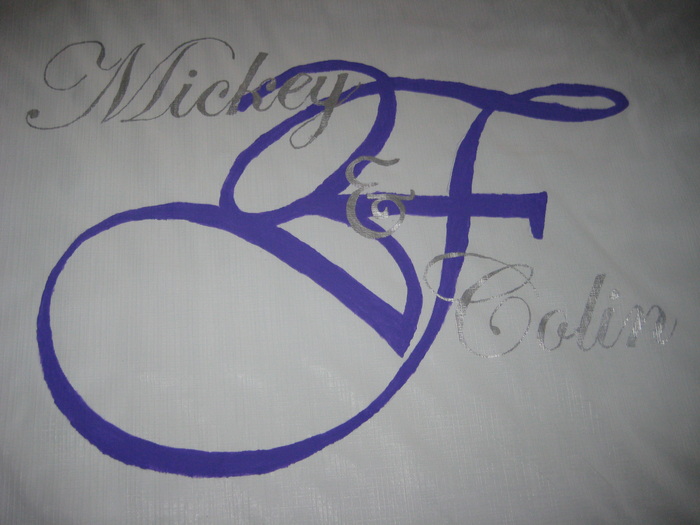
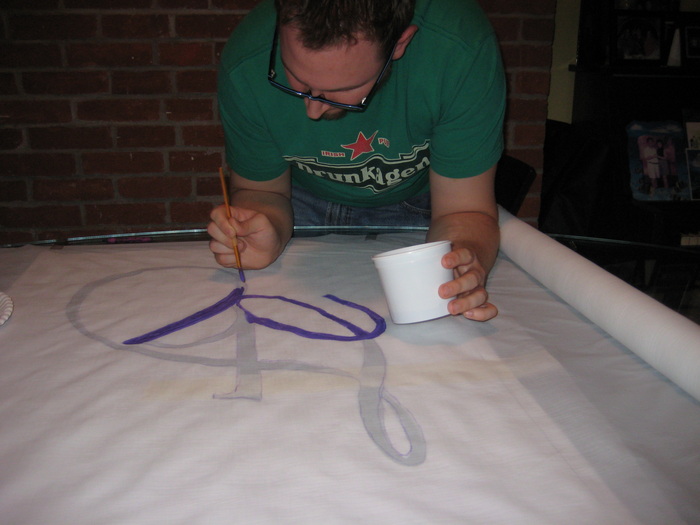
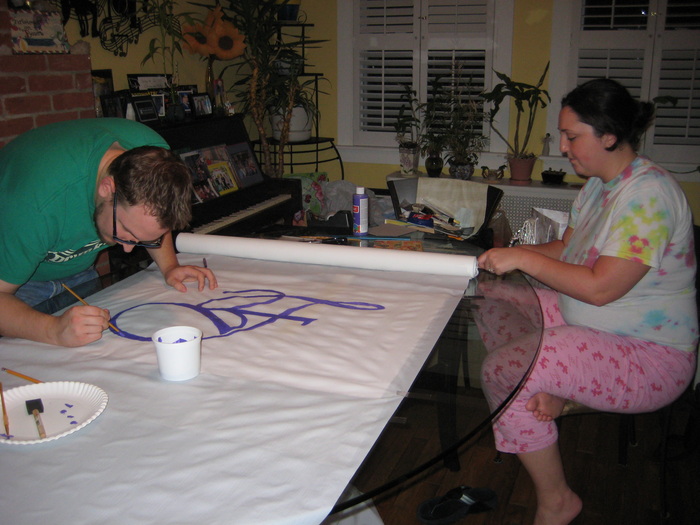
5. Start painting! I would suggest working on the lighter colors first, and also suggest working from the middle to the outside. I started in the middle of my "F" and worked my way out toward the edges. I used a variety of different brushes that had different sizes. And I was just patient--I took my time. If you smudge a little outside of the lines, it's OK--you can modify the letter a little bit by "smoothing it out" and making it look like the letter is supposed to do that! But there's really no room for errors like dropping wet paint brushes or smearing the paint with your hands!
6. Allow your first color to dry before moving on to the next. I let the aqua K dry for a good 3-4 hours before beginning work on the silver lettering.
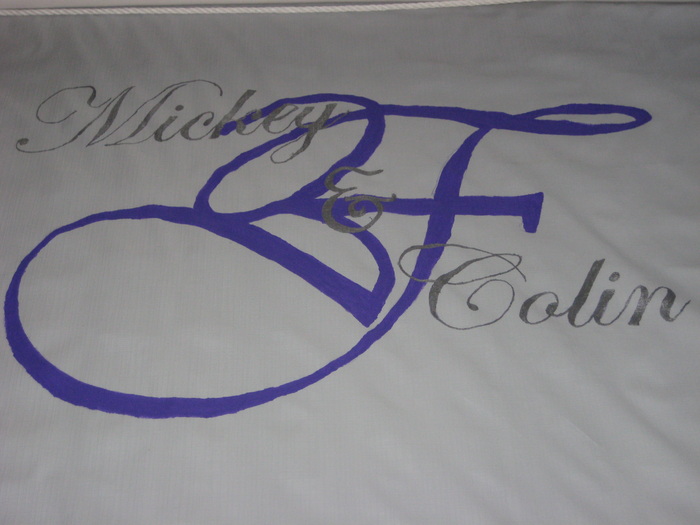
7. Paint in the rest of your lettering, again working inside out.
8. Allow the whole thing to dry, and you're finished! Then roll it back up onto the roll and store in a garbage bag or somewhere else for safe keeping until the wedding.
Supplies:
Aisle Runner (from Michaels) $25 - with coupon
Paint (one bottle purple, one bottle silver, and one bottle black) $6 - for all three
Paint Brushes - $3
Paint Sponge - $2
Wax Paper - $1
Englarged Monogram - $2 (from Staples)
Masking Tape - had it already
Crayon - had it already
Directions:
(These were graciously borrowed from "Road to the Aisle" blog and adapted for our colors, monogram, and table!)
1. Figure out where on the aisle runner you want to paint the monogram. Our aisle runner is 100 ft, with a 100-ft. aisle. We decided to put the monogram about 10-12 feet from the end of the runner so that it will be situated at the back of the church. 2. Lay out the enlarged monogram on a table or floor, and tape down so it will not move. Lay the aisle runner over the monogram and line it up until you like its position.
3. Now, tape wax paper to the table/floor before repositioning your aisle runner to paint it. This will prevent paint from bleeding through onto your surface. I've heard some people have made the mistake of putting paper underneath--paint soaks through and gets the paper wet, and it ends up sticking to the back of the runner! Definitely use the wax paper.
4. Then, trace the design with a crayon (we tried pencil and that was a fail). However, if you're using lighter color paints, I suggest doing it as lightly as possible (while still being able to see it, of course!) because the lighter colors won't cover the pencil marks as well.
5. Start painting! I would suggest working on the lighter colors first, and also suggest working from the middle to the outside. I started in the middle of my "F" and worked my way out toward the edges. I used a variety of different brushes that had different sizes. And I was just patient--I took my time. If you smudge a little outside of the lines, it's OK--you can modify the letter a little bit by "smoothing it out" and making it look like the letter is supposed to do that! But there's really no room for errors like dropping wet paint brushes or smearing the paint with your hands!
6. Allow your first color to dry before moving on to the next. I let the aqua K dry for a good 3-4 hours before beginning work on the silver lettering.
7. Paint in the rest of your lettering, again working inside out.
8. Allow the whole thing to dry, and you're finished! Then roll it back up onto the roll and store in a garbage bag or somewhere else for safe keeping until the wedding.